Simple IR Proximity Sensor With Arduino 5 Steps (with Pictures

Arduino Compatible IR Obstacle Avoidance Sensor Module Australia
Interfacing IR Sensor Module with Arduino In this tutorial, we will learn about the Infrared proximity Sensor module, how it works and how to interface it with Arduino. Outline What is an IR sensor? Types of IR Sensor How Does an IR (Infrared) Proximity Sensor Module Work? Applications of IR Sensor IR Sensor Pinout IR Proximity Sensor Module Parts

Interfacing SHARP GP2Y0A710K0F IR Distance Sensor with Arduino
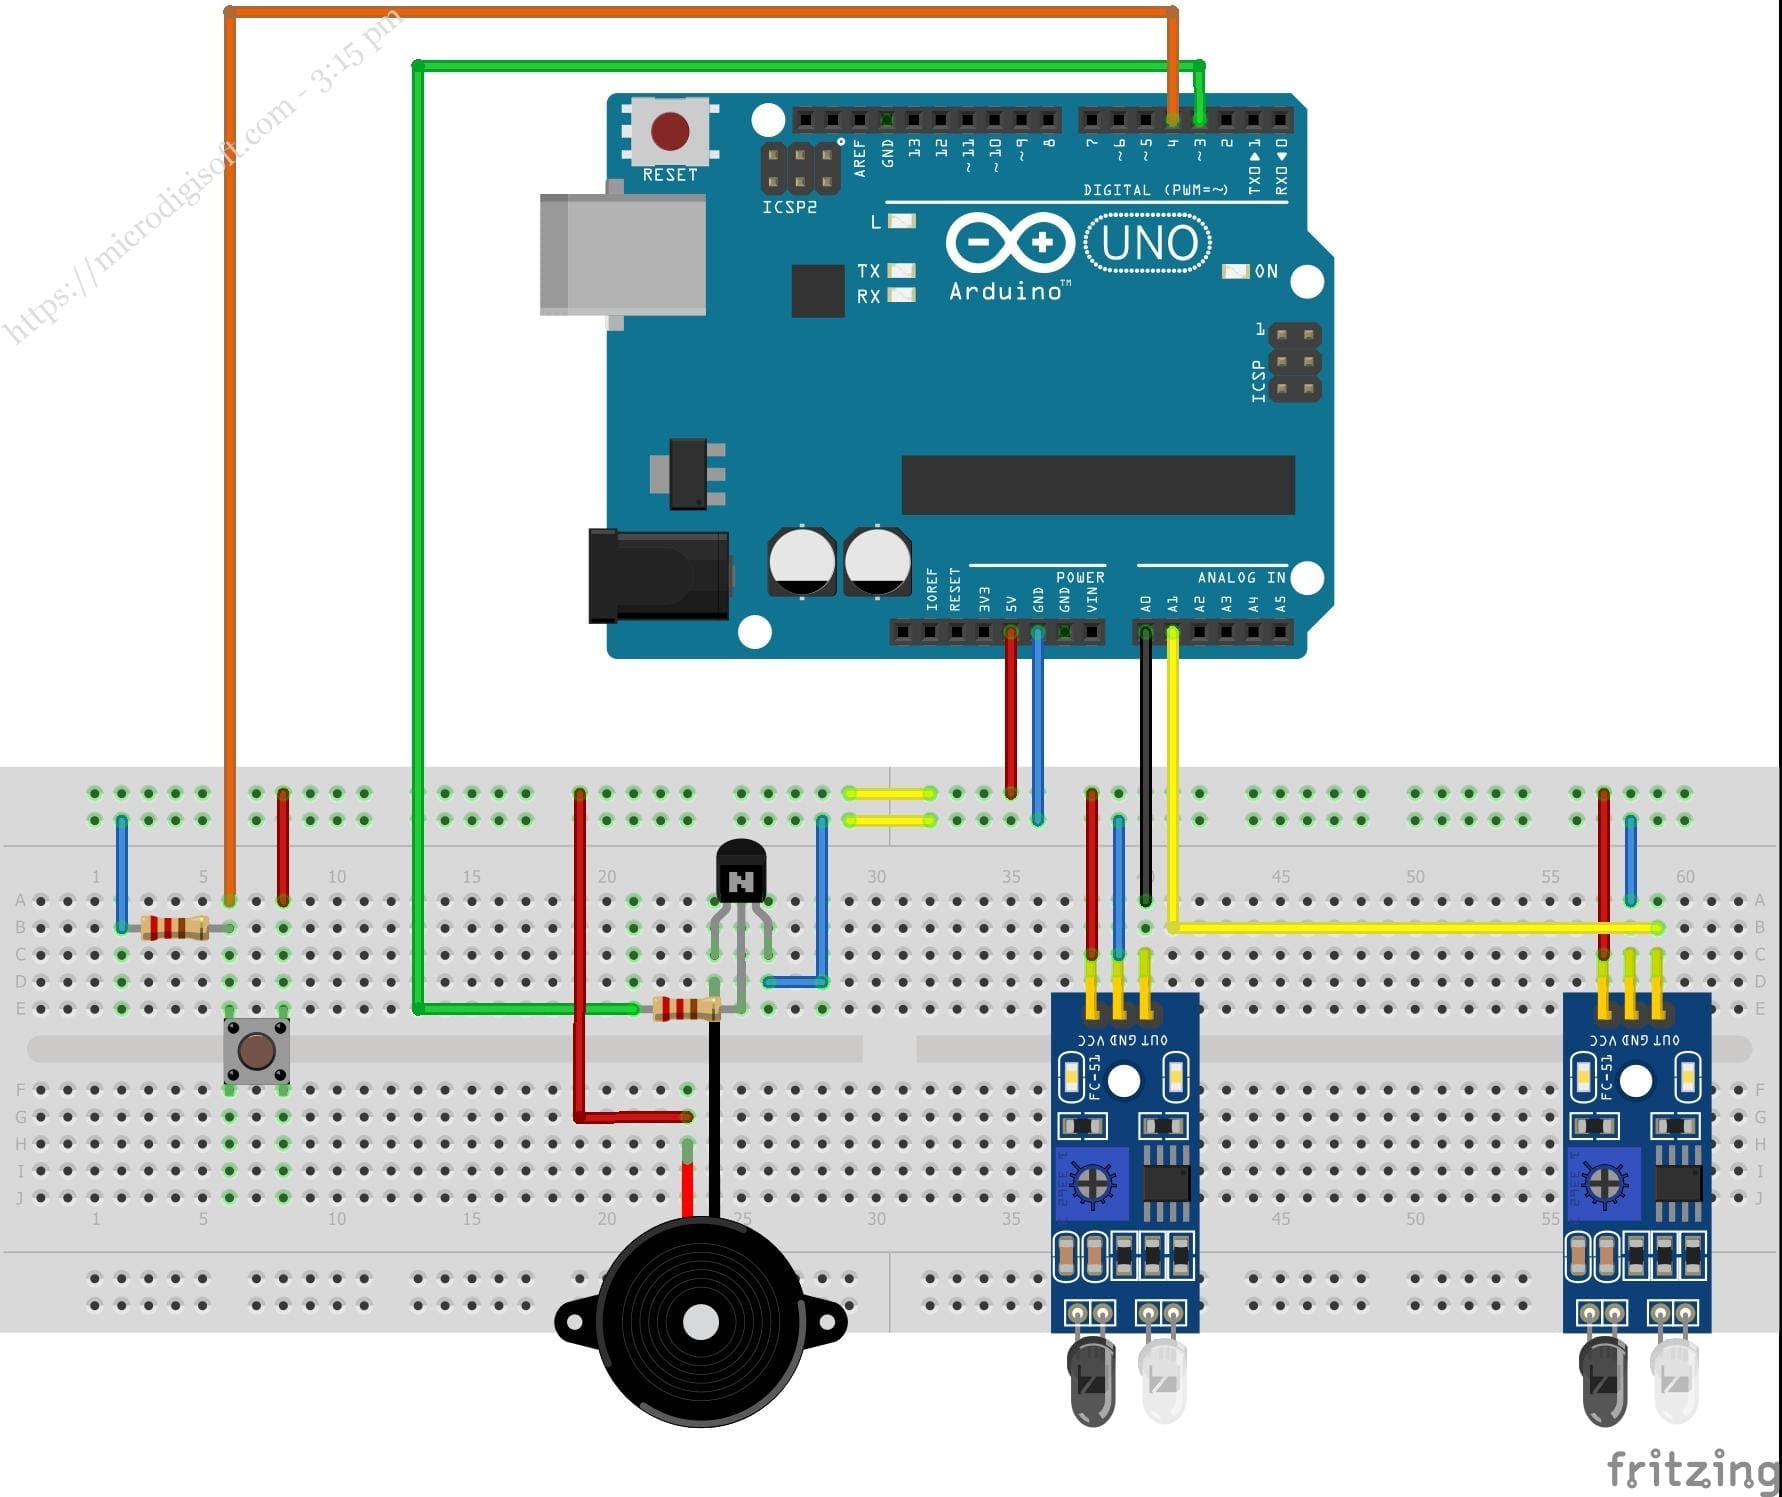
Step 2: Arduino UNO R3 Pinout and IR Sensor Pinout. 1. VCC: is the IR sensor's power supply pin, which we connect to the Arduino's 5V pin. 2. GND: A 5V TTL logic output is provided by this pin. LOW indicates that no motion is detected; HIGH indicates that motion is detected.
Arduino Tutorial IR Distance / Line Tracing / Line Tracking Sensor (MH
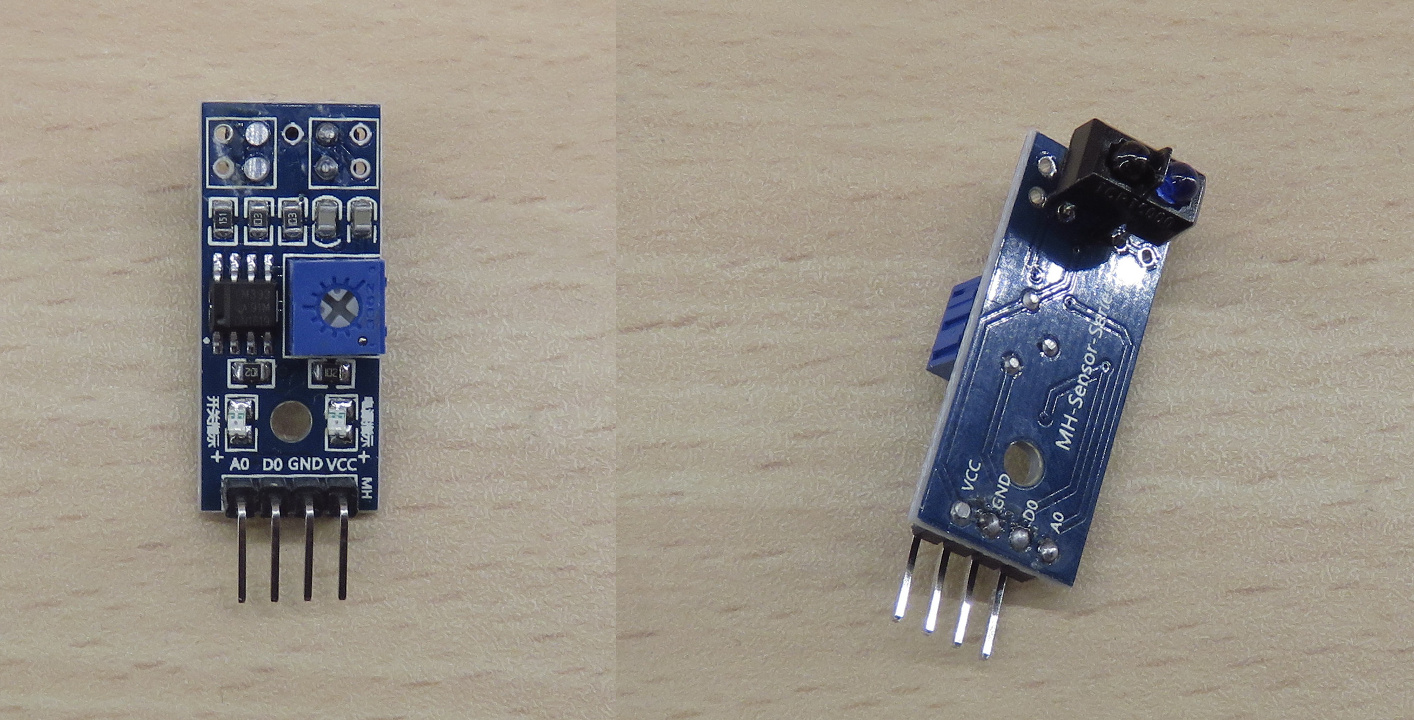
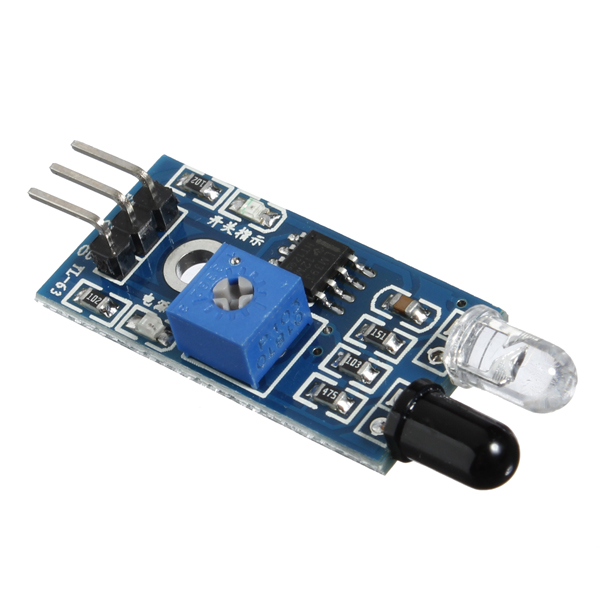
Infrared (IR) Sensor Module with Arduino. Infrared (IR) Sensor Module is a distance proximity sensor "switch" . When there is an object or obstacles that are close enough to block the view in front of 2 LEDs, it triggers the infrared trans-receiver module. The clear LED is the IR emitter while the black LED is the IR receiver.

Interfacing Electronics Projects
Table of Contents What is an IR Sensor? How does an IR Sensor work? Different versions of IR sensor with pinout IR sensor with three pins IR sensor with four pins (Output type): IR sensor with four pins (Enabling/disabling): IR sensor with a single potentiometer The IR sensor with two potentiometers: IR sensor Arduino Code

IR SENSOR INFRARED SENSOR MODULE FOR ARDUINO/PIC PROJECTS Buy IR
Components: IR Sensor What is IR Sensor? An IR sensor, also known as an Infrared sensor, is an electronic device that detects and measures infrared radiation. Infrared radiation is a type of electromagnetic radiation with a wavelength longer than visible light.
Infrared Flame Detector Sensor Module All Top Notch
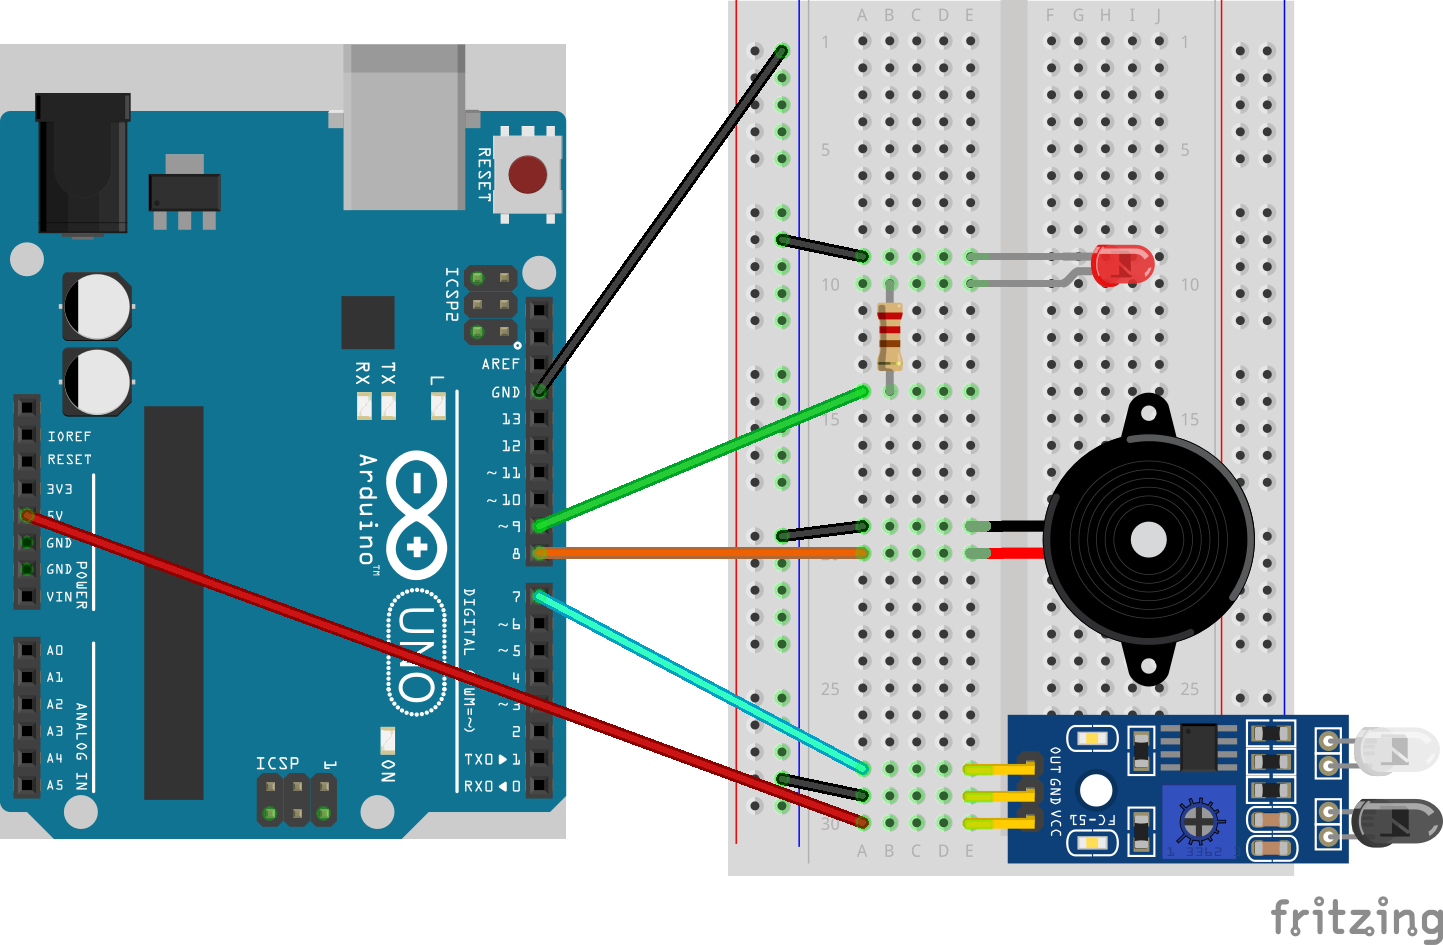
How to use IR Sensor Module with Arduino. We need to connect the IR sensor with Arduino properly to read the output of the sensor. First of all, we connected the sensor Vcc pin to the Arduino 5v pin and the GND pin is connected to the Arduino ground (GND) pin, to activate the IR sensor module. Then connect the sensor output pin to one of the digital pin of Arduino to read the output value from.

Modulo Arduino Sensor IR infrarrojo (reflexivo)
In this guide, we will go through basics of connecting the IR Sensor Module to an Arduino UNO board. We will also discuss writing the code necessary for the Arduino to interpret the signals from the IR sensor. This enables the implementation of various applications, such as object detection, proximity sensing, and motion-activated systems.
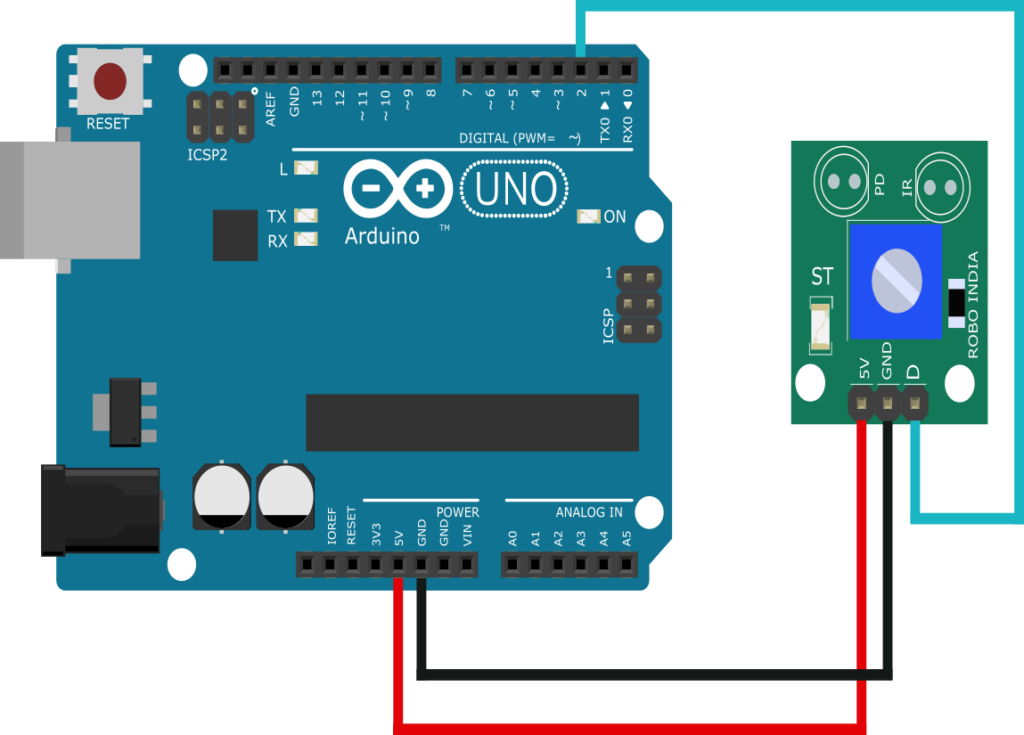
Arduino Digital Infrared Sensor Robo India Tutorials Learn
July 12, 2021 Arduino Project 0 Comments This project shows you how to automatically turn ON and OFF a Light using an Arduino with IR Sensor. IR technology is used for various purposes in daily life as well as in industry.

Infrared (IR) Sensor Module with Arduino A blog about DIY solar and
Overview IR detectors are little microchips with a photocell that are tuned to listen to infrared light. They are almost always used for remote control detection - every TV and DVD player has one of these in the front to listen for the IR signal from the clicker.
IR SENSOR AND ARDUINO INTERFACING » PIJA Education
Uploading the code to the Arduino board: Step 1: Connect the Arduino board with the computer using a USB cable. Step 2: Next type the code mentioned above. Step 3: Select the right board and port. Step 4: Upload the code to the Arduino. Step 5: The LED will glow when any obstacle is detected by the IR sensor. Code Explanation: Firstly, the pins are declared using an int datatype variable LED.

Simple IR Proximity Sensor With Arduino 5 Steps (with Pictures
Using an IR Sensor Subscribe The good news is that it is very easy to hook up this sensor. Just connect the output to a digital pin. The bad news is that the Arduino's friendly digitalRead () procedure is a tad too slow to reliably read the fast signal as its coming in.
How to use IR sensor with Arduino? (With full code) Bihar Digilent
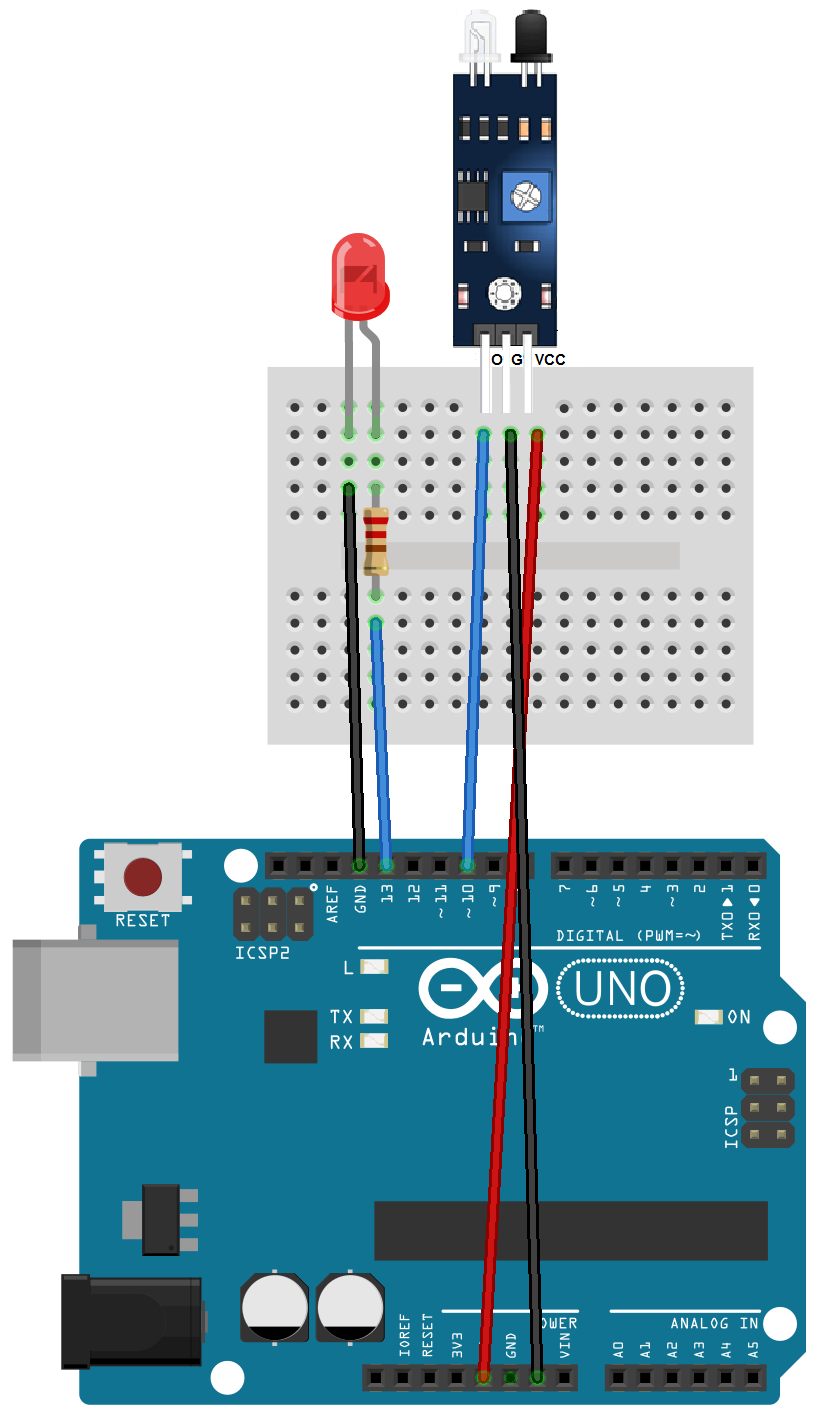
Step 3: The Circuit. Follow the schematic to make the circuit. Here, the voltage produced by the IR Receiver is converted from analog to digital and is used as a reference to know whether the object is detected or not. This pic can be called as the signal pin. An LED is used to indicate the detection of the object.
Door alarm circuit using IR sensor and Arduino board
How does an infrared (IR) remote and receiver work? IR communication basics IR signal protocol Types of IR receivers Connecting an IR receiver to the Arduino IR receiver connections Installing the IRremote Arduino library Determine the IR protocol used by your remote IR remote protocol finder Finding the key codes for your remote
Infrared IR Sensor Receiver Module for Arduino Robotist
Hello there. I am using I2C serial communication of arduino to transfer rmp (using IR sensor) from arduino uno to arduino mega. However, when I print the output in mega, it brings in additional trash values in the character array. I wish to eliminate these trash values. Please help me where i can improve the code. Also point out if there is a better way to do this if possible. Sender code: #.
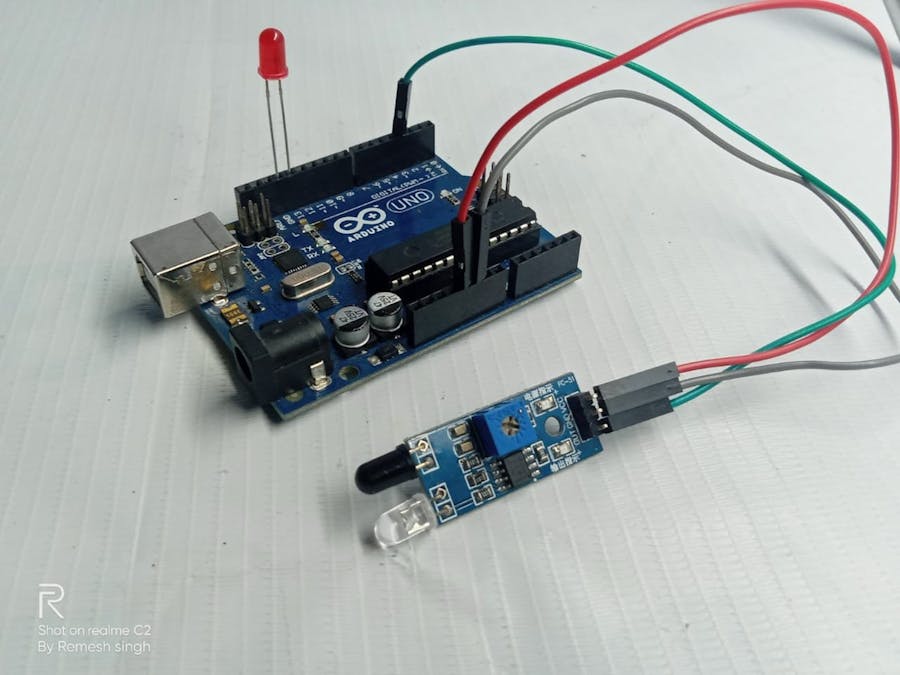
Arduino IR Sensor with Buzzer and LED
The infrared (IR) obstacle sensor is used to detect the presence of any obstacle in front of the sensor module by using the infrared signal. The detection range is from 2cm to 30cm. The detection range can be adjusted by a built-in potentiometer. Pinout IR obstacle avoidance sensor includes three pins: GND pin: needs to be connected to GND (0V)
Infrared Obstacle Avoidance Sensor For Arduino Smart Car Robot
Wiring these sensors for Arduino use is really easy. First up you'll need to power the transmitter. Connect the black wire to ground and the red wire directly to 3.3V or 5V power. It will draw 9mA from 3.3V (lower power) and 20mA from 5V (better range) Next up you'll want to connect up the receiver. Connect the black wire to ground, the red.
